Monday, September 2, 2019

Crochet Unicorn Macaron Keychain


This is a keychain size Unicorn macaron
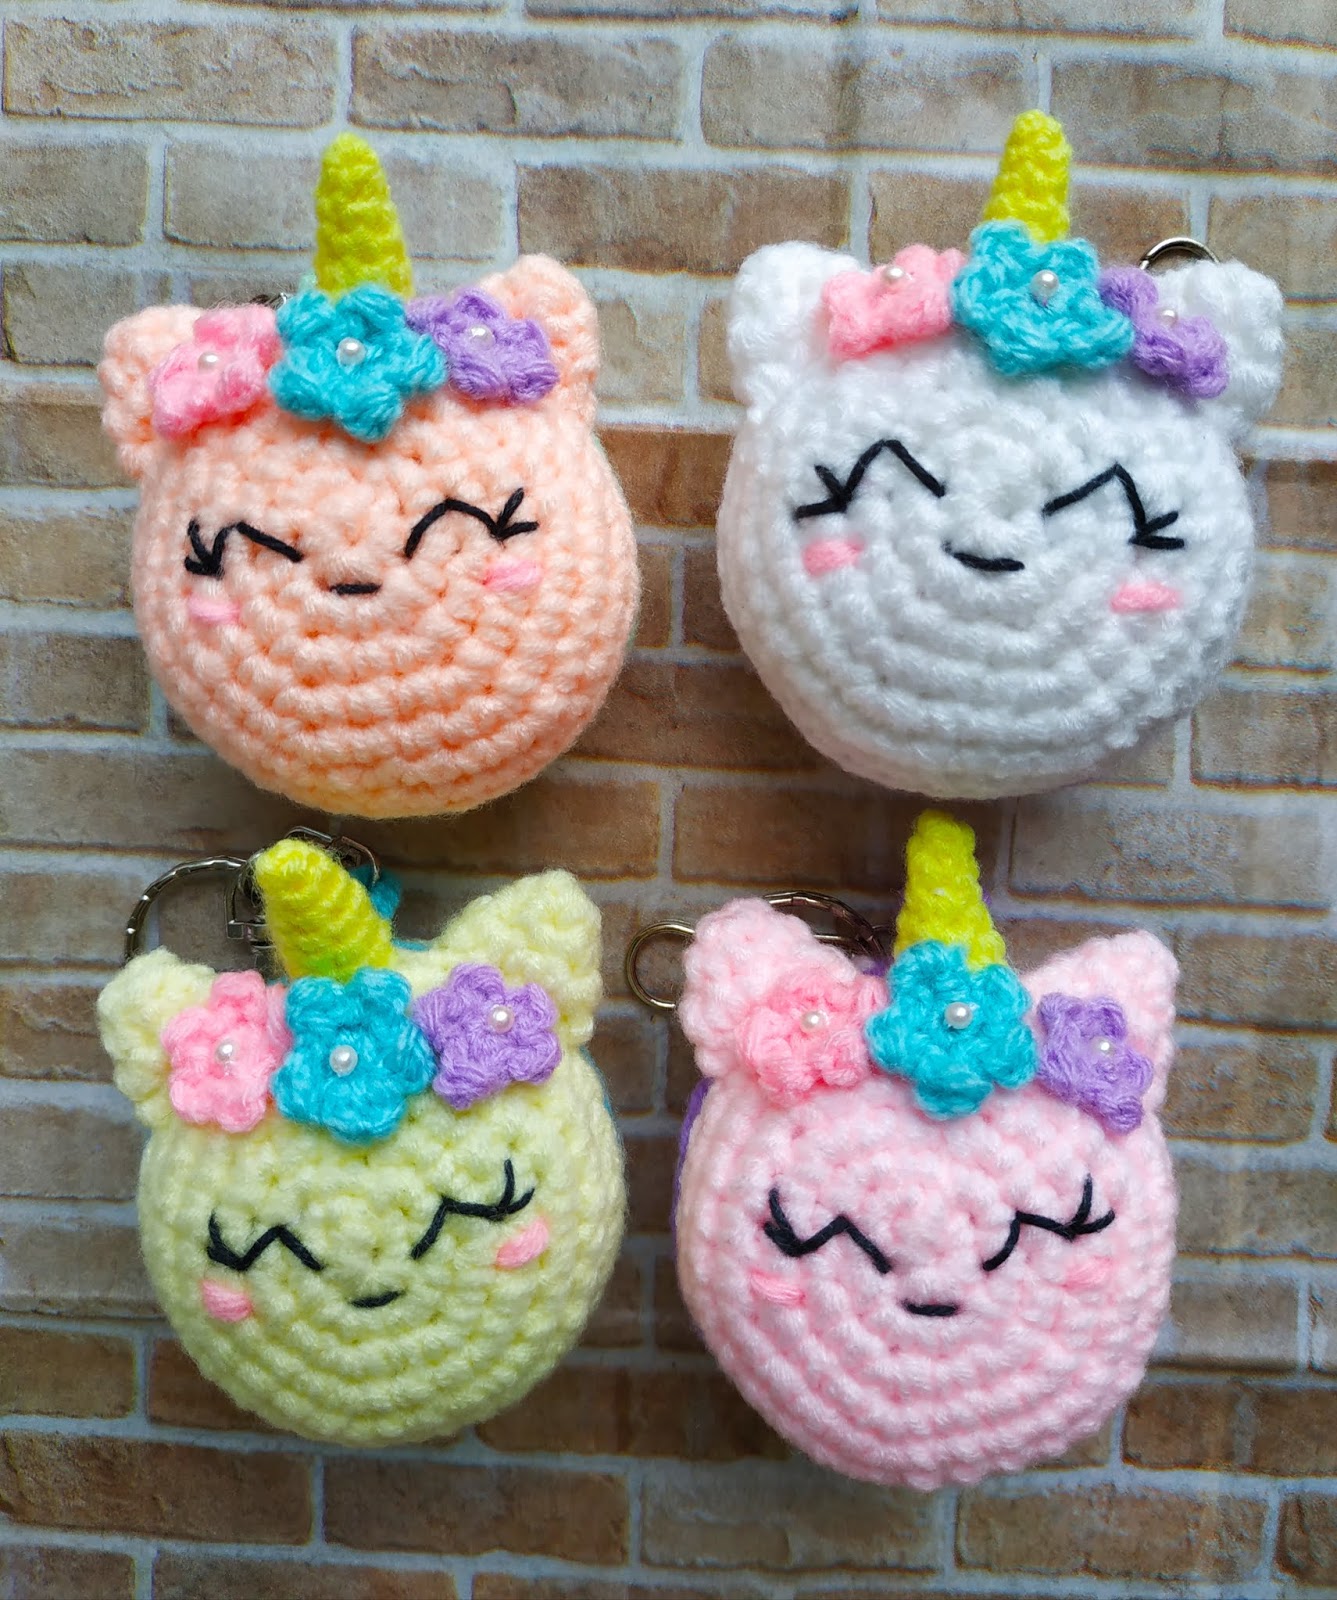
Diameter is 6cm and thickness is 4.5cm


Things you need :
1. White 5 ply milk cotton yarn or other unicorn colours . 
2. Pink 5 ply milk cotton yarn (you can use any other colour)
3. Yellow, pink, purple and blue 4 ply acrylic yarn for horn and flowers and cheeks
4. Hook 4mm and 2.5mm
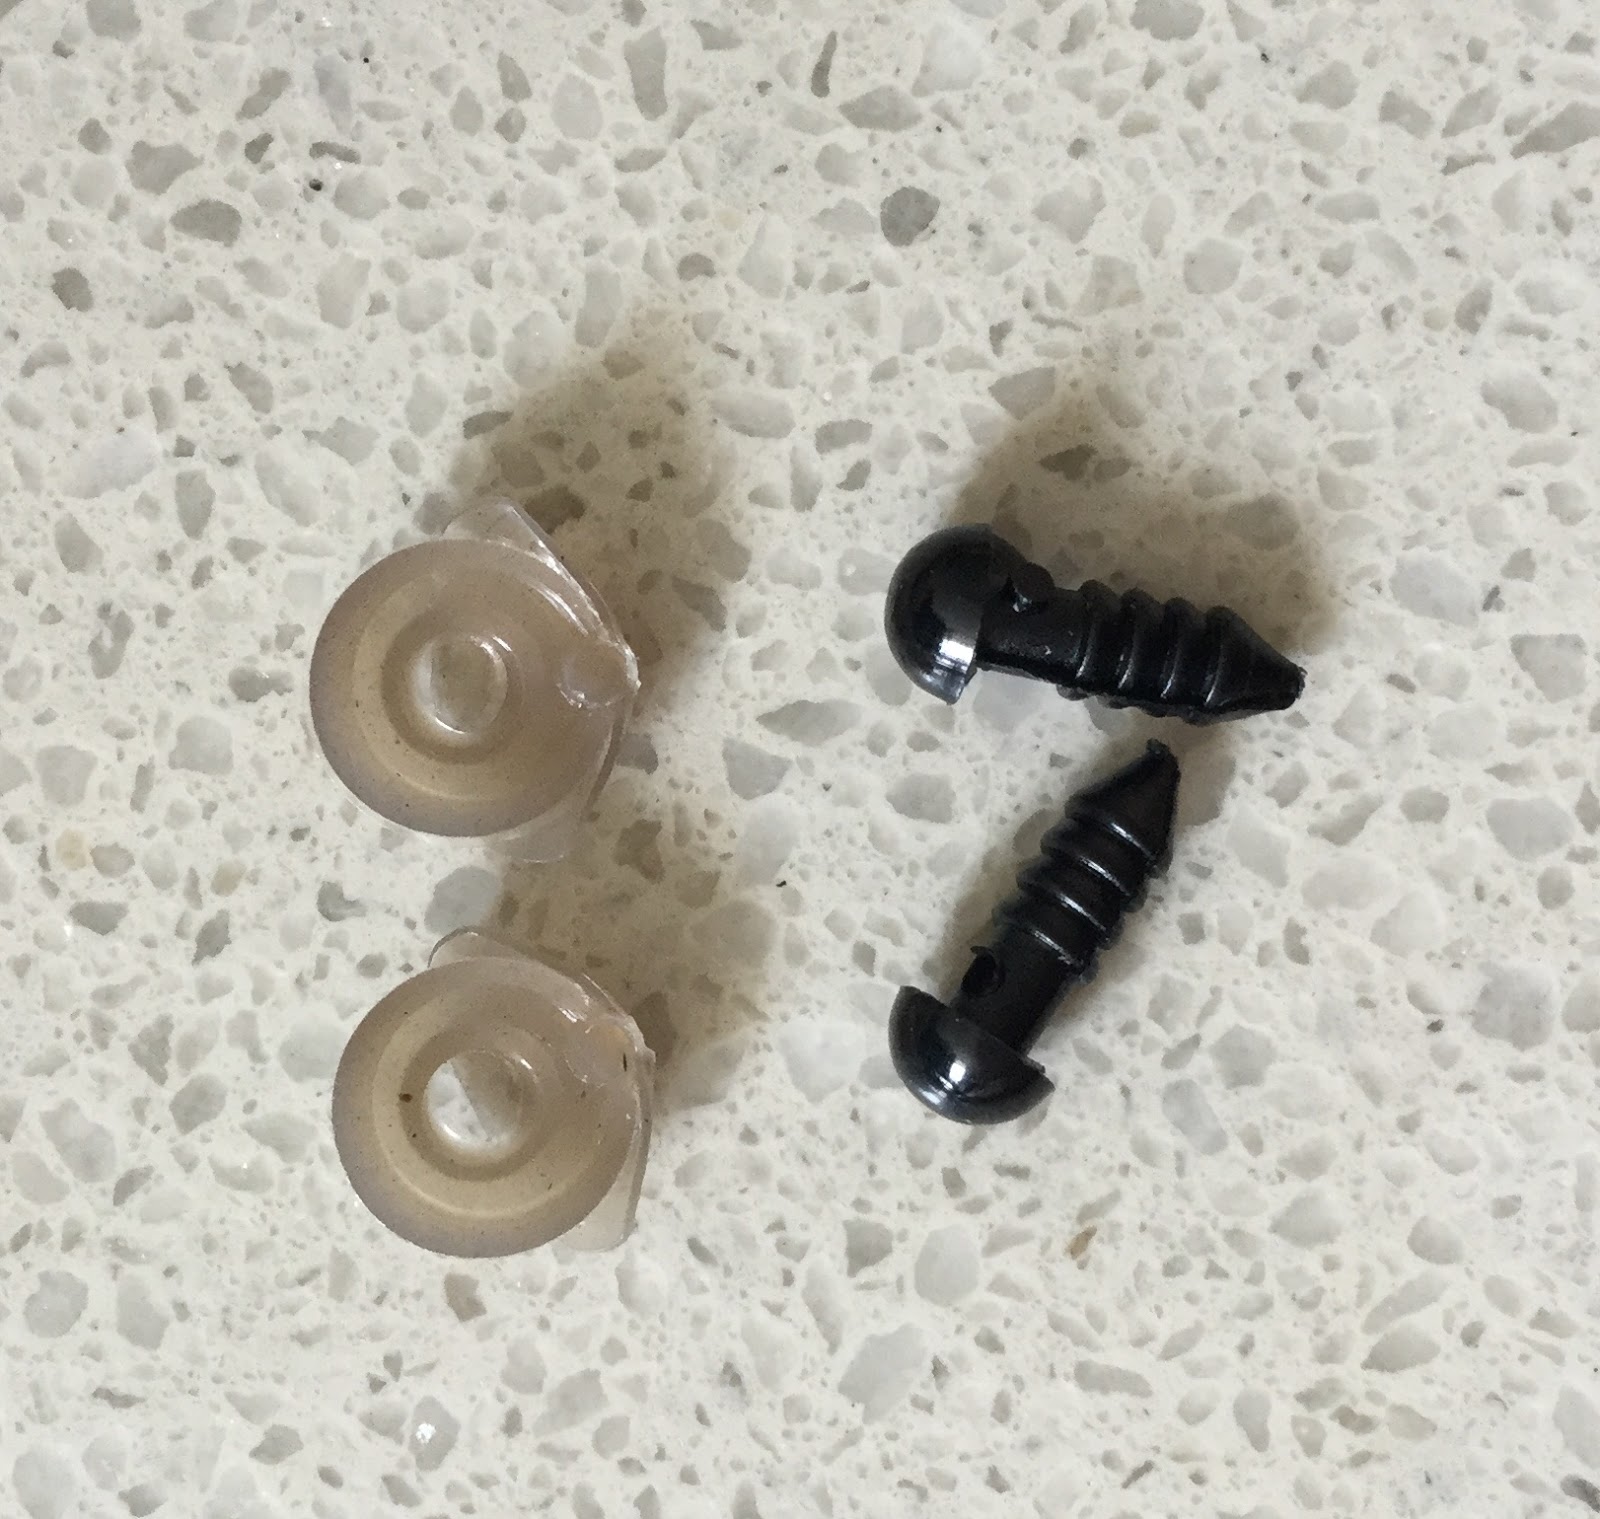
5. Black 4 ply yarn for the eyes and mouth. 
6. 3 Pearl beads for the flowers
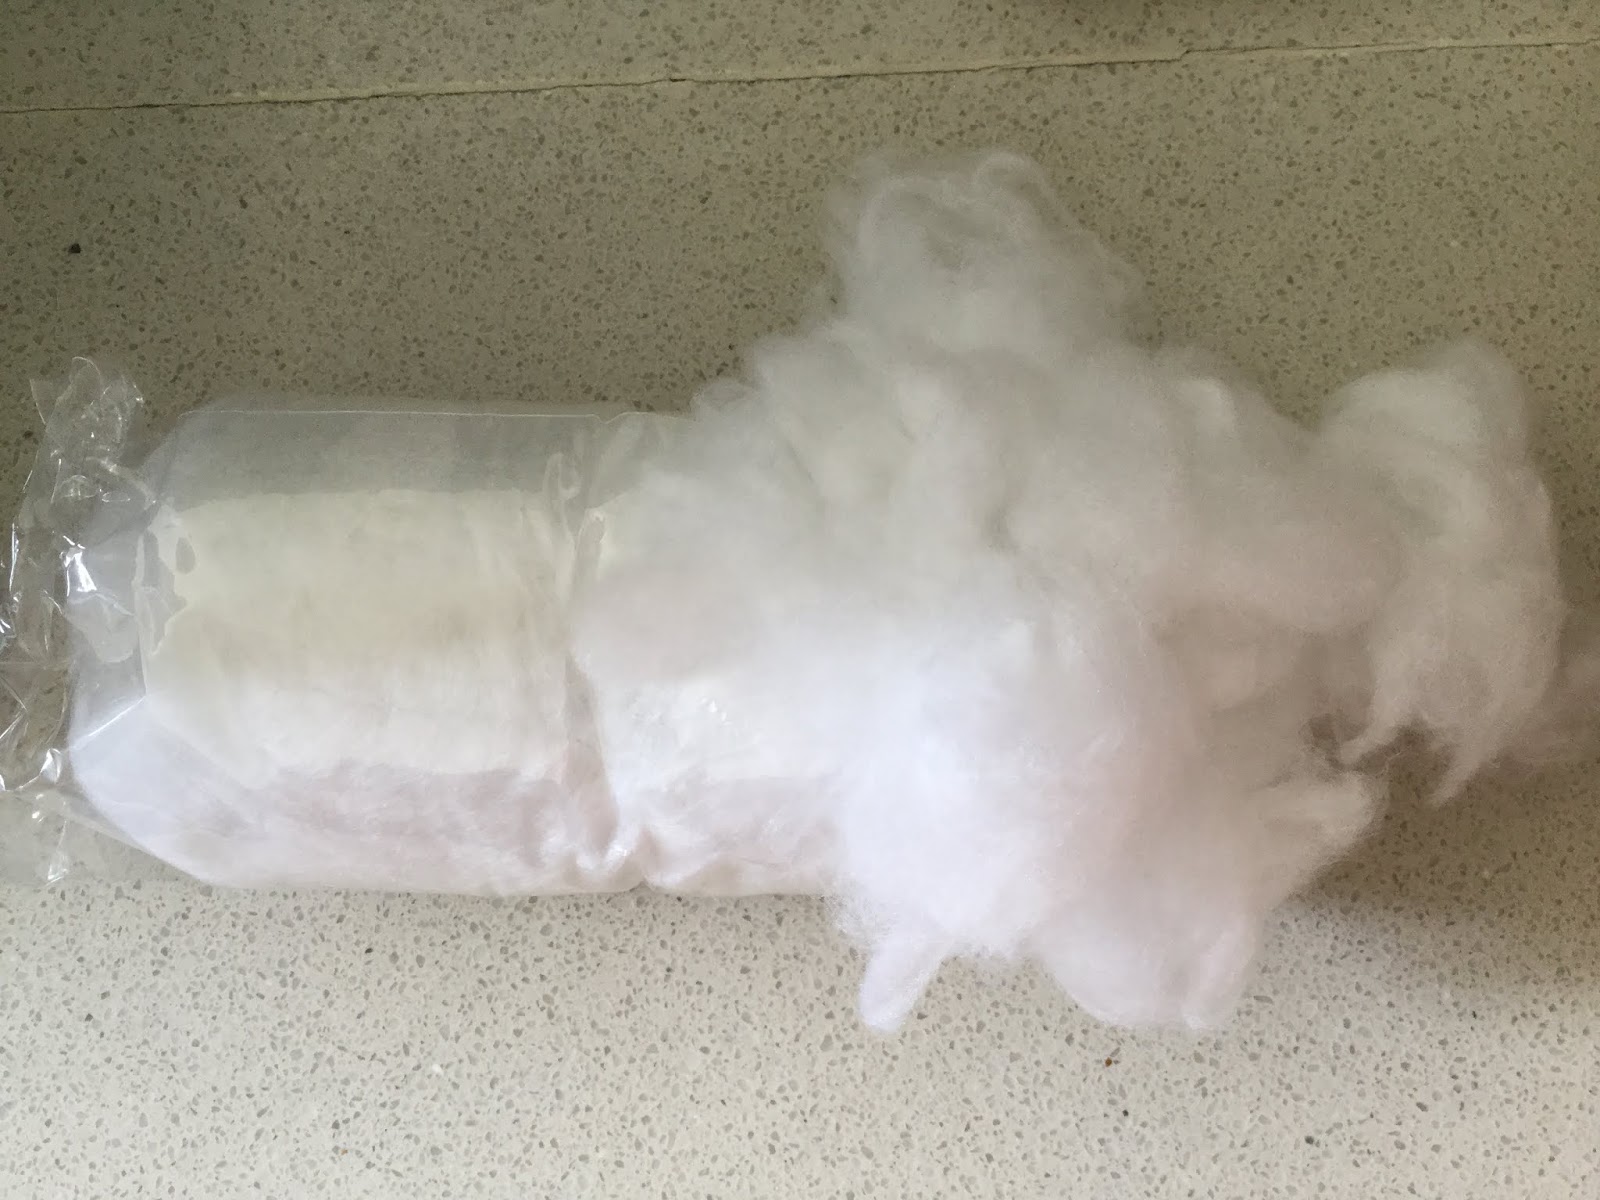
7. Filling for stuffing
8. A key ring

Macaron: (Make 2)
Using 5 ply white and pink milk cotton yarn. Hook 4mm
R1: 6 sc in magic ring (6)  
R2: 2sc in each st (12)
R3: *sc in next st, 2 sc in next st* rep **(18)
R4: *sc in next 2 st, 2sc in next st*, rep ** (24) 
R5: *sc in next 3 st, 2sc in next st*, rep ** (30)
R6: *sc in next 4 st, 2sc in next st* rep ** (36)
R7: sc in each st (36)
R8: Switch to pink yarn and do sc back loop only for each of the 36 stitches. Slip stitch and cut and leave a tail for sewing. This is the filling part of the macaron. You can use any colour you like. 

Repeat R1 to R7 only for the bottom piece . 

Ears: (make 2 )
Using 5ply white milk cotton yarn. Hook 4.0mm
R1: 4 sc in magic ring (4)
R2: *sc in first st, 2sc in next st* rep ** 1x (6)
R3: *sc in first st, 2 sc in next st* rep ** 2x (9)
Slip stitch, cut and leave a tail for sewing

Horn (make 1)
Using 4 ply yellow yarn. Hook 2.5mm
R1: 4 sc in magic ring (4)
R2: sc in first 3 st, 2 sc in next st (5) 
R3: sc in first 4 st, 2 sc in next st (6) 
R4: sc in first 5 st, 2 sc in next st (7)
R5: sc in first 6 st, 2 sc in next st (8)
R6: sc in first 7 st, 2 sc in next st (9)
Slip stitch, cut and leave a tail for sewing


Flower: (make 3)
Using 4ply pink, purple and blue yarn. Hook 2.5mm
R1: 5 sc in magic ring and sl st to the first stitch
R2: *ch 1, dc, ch 1 and sl st in the same stitch, and sl st to the next st*, rep ** to form 5 petals. Slip stitch , cut and leave a short tail for sewing.


Assemble :
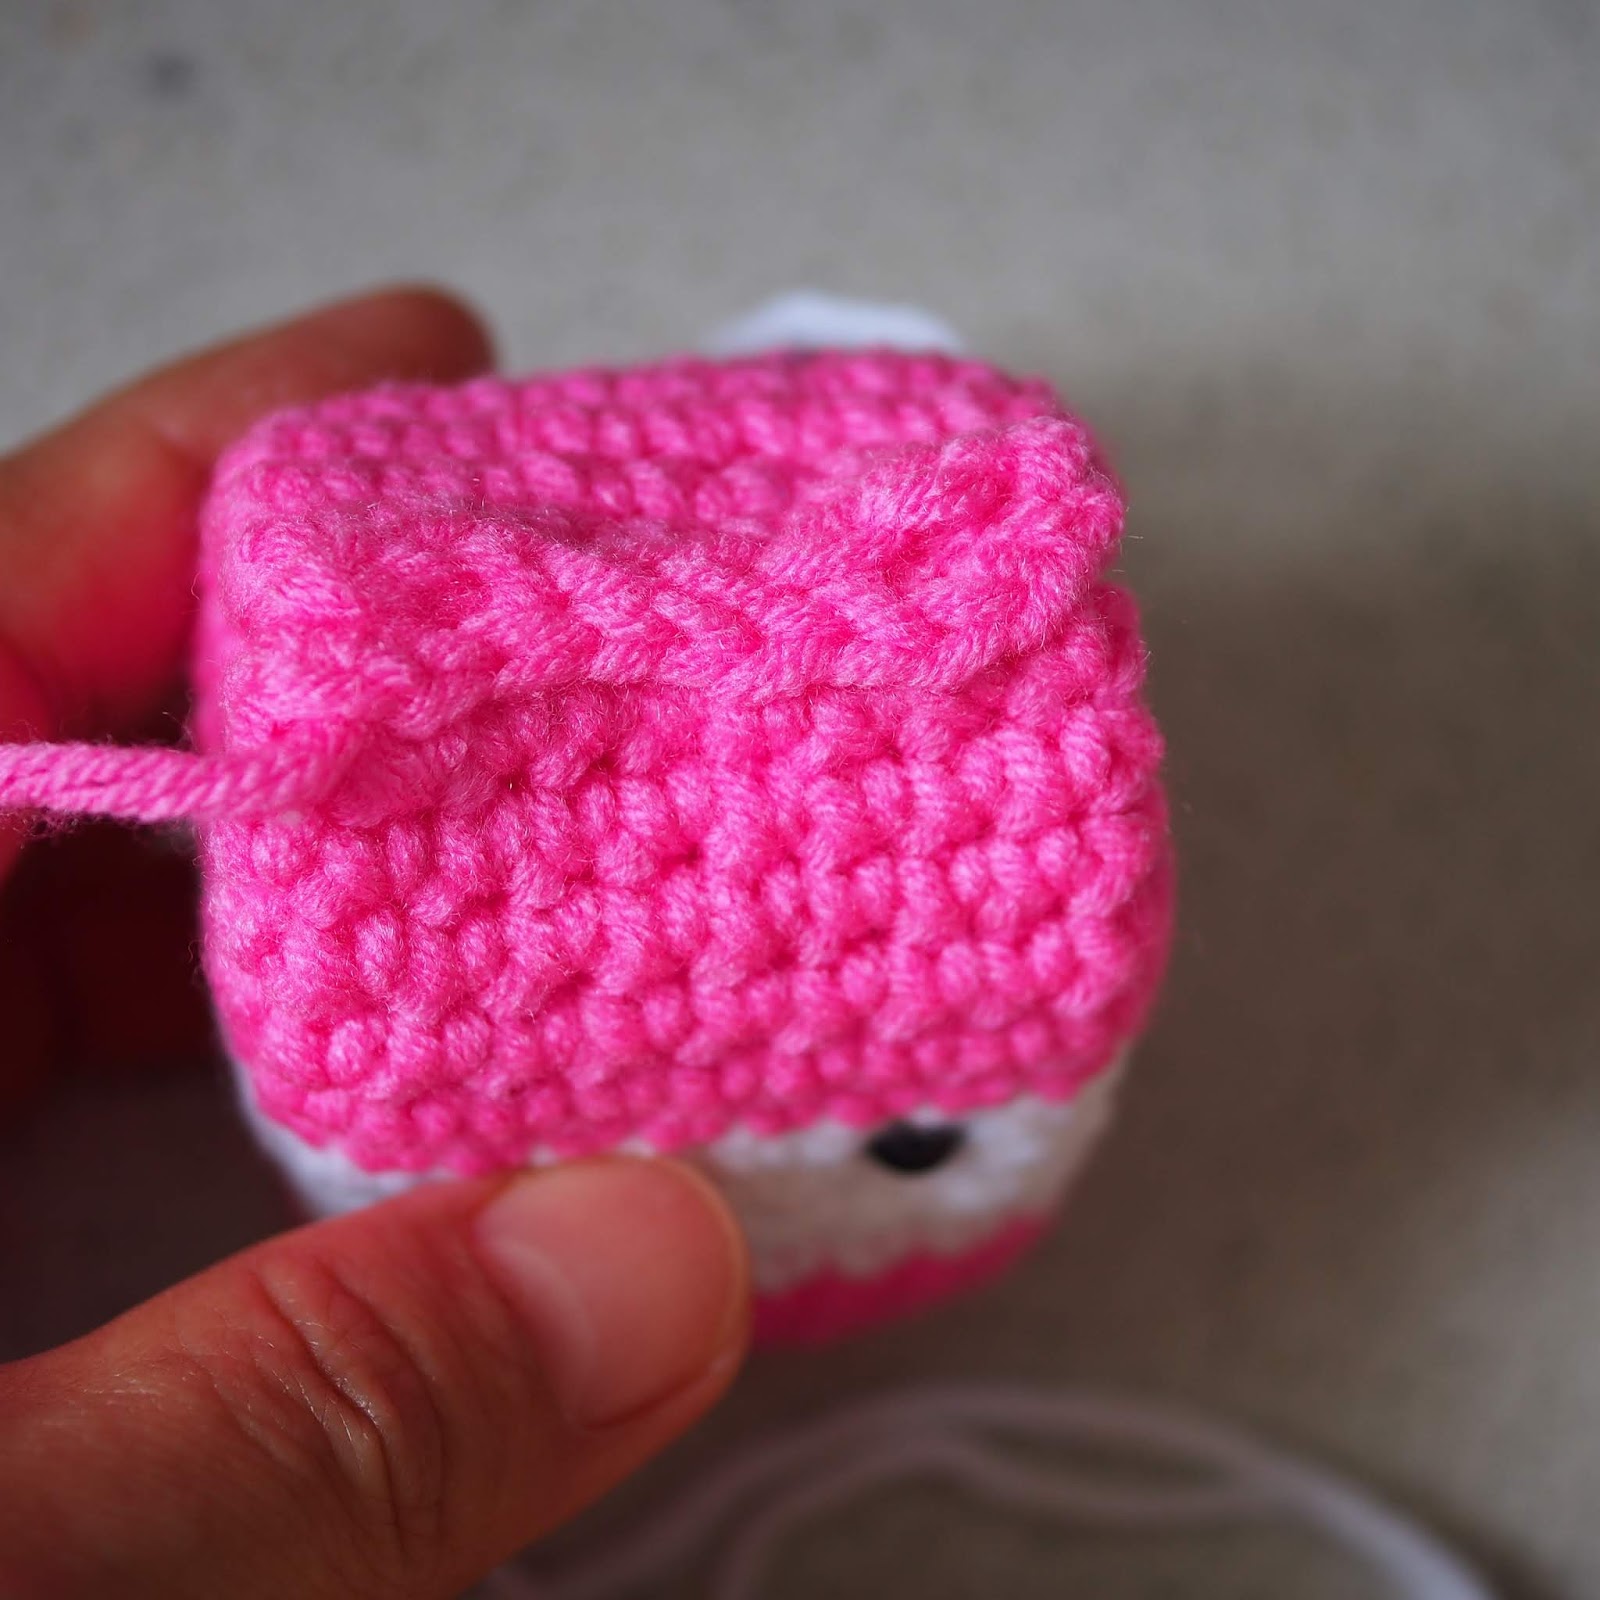
Step 1 : Using the tail pink yarn, sew the 2 pieces of macaron together. Pass the needle though the inner "V" of each macaron only. Just before sealing up the opening, add stuffing to fill up the macaron.

Step 2: Attached the 2 ears as shown below. Sew on the eyes and mouth (optional)

Step 3: Sew on the horn. Add a little stuffing to firm up the horn.

Step 4: Sew on the flowers

Step 5: Sew on the pearl beads (optional)

Step 6: Lastly, attached a key ring.


Thessalonians 5:16-18: “Rejoice always, pray continually, give thanks in all circumstances; for this is God’s will for you in Christ Jesus." 


Monday, August 19, 2019

Crochet Milk Carton Keychain


This is a key chain size Milk Carton

Things you need 
1. A pair of 5mm or 6mm safety eyes
2. Cardboard for base and sides
3. 5ply white and coloured milk cotton yarn of your choice 
4. 4ply black yarn for mouth
5. 4ply pink yarn for cheek
6. Key ring
7. crochet hook  3.5mm
8. stuffing (available at Diaso)
9. sewing craft needle.

Steps 
1. Start with the base (coloured yarn)
Row 1: Chain 8. 
Row 2-6: single crochet (7)


2. Building the body (coloured yarn) (3 rows)
Row 1: single crochet in each stitch with 3 single crochet for each of the corner stitch. This helps to build up the squarish corners. 
Row 2-3: single crochet 

3. Changing colour to white yarn (4 rows)
Row 4-7 : single crochet 

4. Changing colour back to coloured yarn (6 rows)
Row 8-13: single crochet . Slip stitch and leave a Long tail for sewing.


5. Cut a squarish cardboard for the base. Cut a rectangular stripe for the sides of the square body. These cardboard helps to give a boxy look.


6. Fit in the cardboard . The height of the cardboard for the sides of the body should be about the height of row 8. To attach the eyes, pierce the cardboard with a sharp object and make sure the eyes pass thru the cardboard. Lock the eyes with the washer. Sew the mouth and cheeks. Stuff with fillings.


7. Using the tail of the coloured yarn, sew and seal the TOP . You need to fold the 2 sides in just like those real milk cartons.


top view

side view 


8. Using white yarn, do 2 rows of single crochet on the TOP. Cut and leave a long tail of white yarn to sew the words MILK on the front side.


9. Lastly , sew the key ring to the left side of the TOP.


Monday, August 12, 2019

Crochet Rainbow Cake Keychain


This is a keychain size rainbow cake. 


Rainbow colour  + White colour 5 ply milk cotton yarns

6mm safety eyes

Stuffing from  Daiso

Black yarn for mouth and pink yarn for cheek

Eyes : 2 pieces of safety eyes 5mm or 6mm with washers
Mouth : mercerised cotton black yarn 

Cheek : 4ply pink yarn ( 2 pieces ) , hook 2.0mm
Row 1: magic circle with 6 single crochet. Slip stitch and leave a short tail for sewing . 

Top : 5ply white milk cotton yarn , hook 3.5mm
Steps:
Row 1 : magic circle . Chain 2 and do 12 double crochet. Slip stitch . 
Row 2: chain 2. Do 2 double crochet in each stitch from row 1. Slip stitch and cut leaving a tail for sewing .

Base and body: 5 ply rainbow colours milk cotton yarn, hook 3.5mm
Start with the base, you may use either white or purple for the base.
Base row 1: magic circle. Chain 2 and do 12 double crochet. Slip stitch.
Base row 2: chain 2. Do 2 double crochet in each stitch. Slip stitch.

Cake body row 1 :  use purple yarn, chain 1  and do single crochet in each back loop only. This helps to create the cylindrical shape. See below on how to change colour .
Cake body row 2 : use pink yarn, single crochet in each stitch
Cake body row 3. : use blue yarn, single crochet in each stitch
Cake body row 4: use green yarn, single crochet in each stitch
Cake body row 5 : use yellow yarn, single crochet in each stitch
Cake body row 6 : use orange yarn, single crochet in each stitch
Cake body row 7 : use red yarn, single crochet in each stitch , slip stitch and cut .

Changing colour
There are few ways to change colour , you may checkout out YouTube for your preferred method . Below 2 pictures show how i change colour. Remove hook off the last stitch, insert hook from inside through the first stitch and hook the last stitch out, then chain 1 with new colour .


Whipped cream : 5ply white milk cotton , hook 3.5mm,
Row 1 : magic circle of 6 single crochet(6)
Row 2 : 2 single crochet in each stitch (12)
Row 3: 4 single crochet in each stitch (48).  Slip stitch and cut leaving tail for sewing to the TOP of the cake .


Cherry : 5 ply red milk cotton , hook 3.5mm
Row 1: magic circle, chain 2 and do 10 double crochet. Slip stitch to close loop.
Row 2: chain 2 and half double crochet decreasing 1 stitch , repeat 5 times (5). Slip stitch and cut leaving a short tail for sewing.

Assemble :
Cut 2 pieces of cardboard the size of the base. Put 1 for the base and 1 for the top. This helps to keep the top and bottom flat after stuffing .

Before you sew the body to the top, attach the eyes on the green row with 3 stitches between the 2 eyes. Lock the eyes with the washers.

Insert 1 circular cardboard on the base.
Use the white yarn tail remaining on the top to sew the body to the top. Insert needle outwards from the center of the body through a red stitch , followed by the back loop of the corresponding stitch on the white top. Repeat till half way closed.

Insert stuffing followed by a piece of the circular cardboard on the top. Complete sewing to seal up the top.
Sew the mouth and the 2 cheeks.
Sew the cherry to the whipped cream.
Sew the whipped cream and cherry to the top of the cake.
Sew the key ring to the side of the whipped cream.