Friday, June 12, 2020

Crochet Bear Keychain


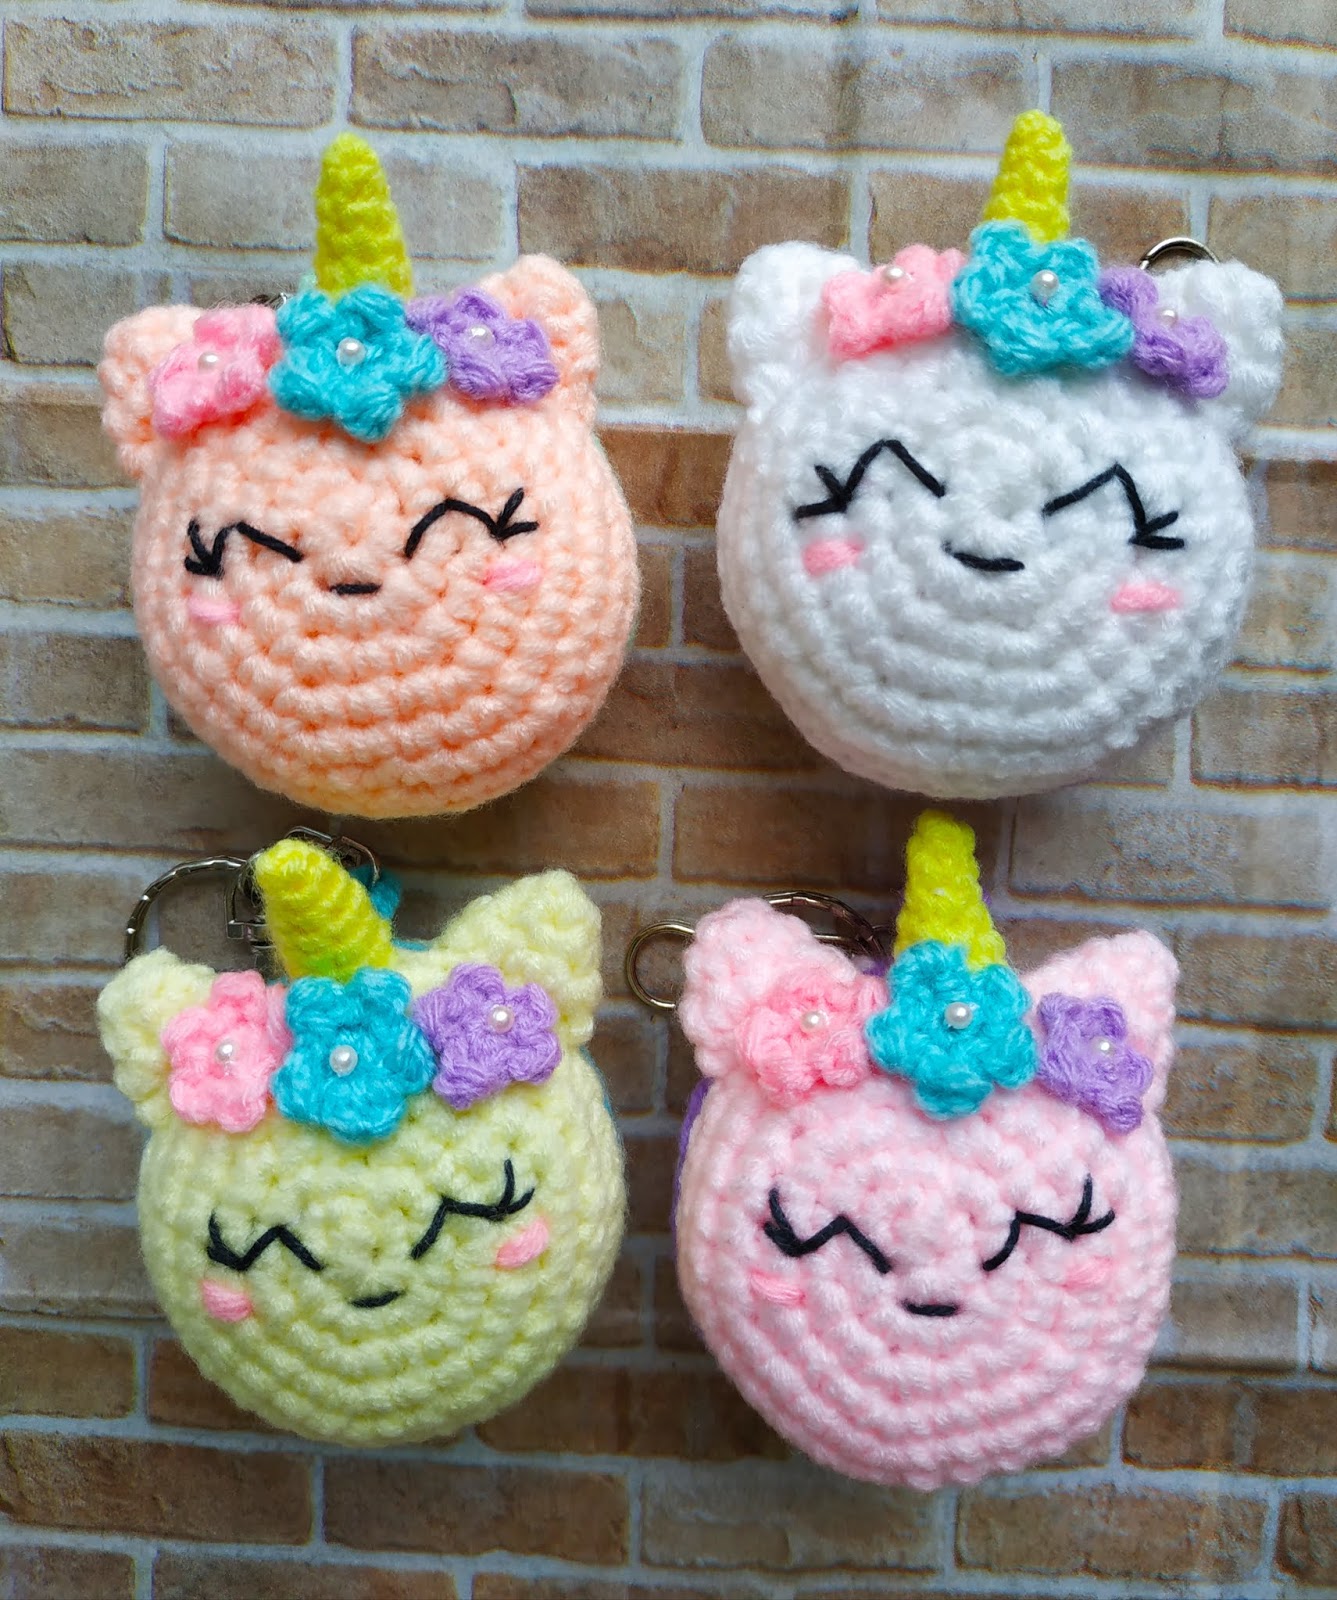
This is a keychain size crochet bear . It is palm size about 10cm tall. Free pattern below.


Yarn used : Hobbii 8/4 cotton light brown (body, ears, hands, legs) , cream (muzzle) , black (nose , eyebrows) , pink and cream (clothing)
Hook : 2.5mm
Eyes : a pair of 5mm safety eyes with washer
Stuffing : polyester stuffing for amigurumi
Keychain : A key ring

Ears (2 pieces with brown yarn)
Row 1: magic circle with 6sc (6)
Row 2: 2sc in each stitch (12)
Row 3: 12sc
Row 4: 12sc
Slip stitch , cut yarn leaving a tail for sewing to the head between row 2 and 3

Muzzle (1 piece with cream yarn)
Row 1: magic circle with 6sc (6)
Row 2: 2sc in each stitch (12)
Row 3: 1sc in each stitch (12)
Slip stitch , cut yarn leaving tail for sewing to the face just below the eyes (eyes to be attached between row 11and 12 with 4 stitch in between)

Arms (2 pieces with brown yarn)
Row 1: magic circle with 5sc (5)
Row 2: 2sc in each stitch (10)
Row 3-6: 1sc in each stitch (10)
Row 7: [1sc, sc2tog ]x3 , 1sc (7)
Row 8-10 1sc in each stitch (7)
Slip stitch, cut yarn leaving a tail for sewing to body .

Head (brown yarn)
Row 1: magic circle with 6sc
Row 2: 2sc in each stitch (12)
Row 3: [1sc, 2sc in next stitch ]x6 (18)
Row 4: [1sc, 1sc, 2sc in next stitch ]x6 (24)
Row 5: [1sc, 1sc, 1sc, 2sc in next stitch ]x6 (30)
Row 6: [1sc,1sc,1sc, 1sc, 2sc in next stitch]x6 (36)
Row 7: [1sc,1sc,1sc,1sc, 1sc, 2sc in next stitch]x6 (42)
Row 8-13: 1sc in each stitch (42)
Row 14: [5sc, sc2tog]x6 (36)
Row 15: [4sc, sc2tog]x6 (30)
Row 16: [3sc, sc2tog]x6 (24)
Row 17: [2sc, sc2tog]x6 (18)
Row 18: [1sc, sc2tog]x6 (12)
Row 19: change to pink yarn . 1sc in each stitch (12)
Row 20: change to cream yarn. [1sc, 2sc in next stitch]x 6 (18)
Row 21: change to pink yarn. 1sc in each stitch (18)
Row 22: change to cream yarn. [1sc, 1sc, 2sc in next stitch ](24)
Row 23: change to pink yarn . 1sc in each stitch (24)
Row 24: change to cream yarn . 1sc in each stitch (24)
Row 25: change to pink yarn . 1sc in each stitch (24)
Row 26: change to cream yarn . 1sc in each stitch (24)
Row 27 change to pink yarn . 1sc in each stitch (24)
Row 28-30: change to brown yarn . 1sc in each stitch (24)

Attach the eyes between row 11 and 12 with 4 stitches in between.

Next to crochet 1 leg first
Row 31: 1sc for the next 12 stitches (12) . Skip the next 12 stitches .
Row 32-34: 1sc for each of the 12 stitches (12)
Row 35: [sc2 tog ]x6(6)
Slip stitch , cut off yarn leaving tail for sewing up . Use a sewing needle to close up the last 6 stitches and weave in the end.
Add stuffing to head and body before making the second leg .

To crochet the second leg, start from the side of the body.
Row 1-4 :  1sc for each of the 12 stitches (12)
Row 5: [sc2tog]x6(6)
Fill up the bear with stuffing. Slip stitch , cut off yarn leaving tail for sewing up . Use a sewing needle to close up the last 6 stitches and weave in the end.


Assemble :
To attach ears, fold the circle and sew the ears between row 2 and 3 .

To attach the arms, fill the lower arm with stuffing . Use less stuffing for the upper part of the arm. Use a sewing needle sew the arms to the side of the body just under the head.

To attach the muzzle, use the sewing needle and sew the muzzle just under and between the eyes. Add a little stuffing to puff up the muzzle slightly. Use black yarn, sew the nose and mouth and eye brows.

If attaching a key ring, sewing the key ring to the top of the head.


Monday, June 8, 2020

Crochet Sumikko Gurashi


These little guys are characters of Sumikko Gurashi. They are small and cute,  about 5cm tall. They live in a little house we made for them. The house is made with a wooden box from Daiso. The wall paper and flooring are origami papers from Daiso as well. Free pattern for all 5 characters below. 


Shirokuma - a shy bear who migrated south to avoid the cold


Yarns used : hobbii 8/4 cotton cream colour (body) and black (nose) pink (pouch)
Hook : 2.5mm
Eyes : a pair of 5mm safety eyes with washer

Body 
Row 1: 8sc in magic circle [8]
Row 2: (1sc, 2sc in the next stitch)x4 [12]
Row 3: (1sc, 2sc in the next stitch)x6 [18]
Row 4: (2sc, 2sc in the next stitch)x6 [24]
Row 5: 1sc in each stitch [24]
Row 6: (3sc, 2sc in next stitch)x6 [30]
Row 7-16: 1sc in each stitch [30]
Row 17: (3sc, sc2tog in next stitch)x6 [24]
Row 18: (sc2tog)x12[12]
Add the safety eyes between row 7 and 8, with 5 stitches between the eyes. Fill up with polyester stuffing.
Row 19: (sc2tog)x6 [6]
Slip stitch to close. Cut the yarn stitch up the hole and weave in the yarn.

Hands/legs (2 pieces for hands, 2 pieces for legs) 
Row 1: 6sc in magic circle
Slip stitch to close. Cut leaving some yarn for sewing to the body. Make 4 pieces.
Sew the hands between row 11and 12 somewhere below the eyes.
Sew the legs on the front part of the base such that only 1/4 of the feet can be seen from the front view.


Ears (2 pieces)
Row 1: 6sc in magic circle
Slip stitch to close. Cut leaving some yarn for sewing to the head between row 4 and 5.
To create the pink patch on the ears, I used a sewing needle and pink thread to sew a small patch on the front of the ears only. You could also cut a small pink felt and stick on the ears.

Nose
Sew the nose between the eyes using black yarn.

Pink Pouch (optional)
Row 1 : 4sc in a magic circle [4]
Row 2 : 2sc in each stitch [8]
Row 3: 1sc in each stitch [8]
Row 4: sc2tog x4 [4]
Row 5 : 2sc in each stitch [8] . Slip stitch and cut yarn. Use cream yarn to tie a knot at the opening . Sew the pink pouch to the body and hands.

Penguin - It is an insecure penguin that has identity issue. 


Yarns used : hobbii 8/4 cotton light green colour (body and hands) and white (chest), yellow (beak and feet)
Hook : 2.5mm
Eyes : a pair of 5mm safety eyes with washer

Body 
Row 1: 8sc in magic circle [8]
Row 2: (1sc, 2sc in the next stitch)x4 [12]
Row 3: (1sc, 2sc in the next stitch)x6 [18]
Row 4: (2sc, 2sc in the next stitch)x6 [24]
Row 5: 1sc in each stitch [24]
Row 6: (3sc, 2sc in next stitch)x6 [30]
Row 7-11: 1sc in each stitch [30]
Row 12: 10sc . Change to white yarn and do 4sc. Change back to green yarn and do 16sc [30]
Row 13-15: 9sc. Change to white yarn and do 6sc. Change back to green yarn and do 15sc [30]
Row 16: 10sc . Change to white yarn and do 4sc. Change back to green yarn and do 16sc [30]
Row 17: (3sc, sc2tog in next stitch)x6 [24]
Row 18: (sc2tog)x12[12]
Add the safety eyes between row 7 and 8, with 5 stitches between the eyes. Fill up with polyester stuffing.
Row 19: (sc2tog)x6 [6]
Slip stitch to close. Cut the yarn stitch up the hole and weave in the yarn.

Hands/legs (2 pieces for hands using green yarn, 2 pieces for legs using yellow yarn) 
Row 1: 6sc in magic circle
Slip stitch to close. Cut leaving some yarn for sewing to the body.
Sew the hands between row 11 and 12 somewhere below the eyes.
Sew the legs on the front part of the base such that only 1/4 of the feet can be seen from the front view.

Beak (2 pieces, yellow yarn)
Row 1: ch4 [4]
Row 2: 1sc in 1st ch, 2sc in next ch, 1sc in last ch [4]
Slip stitch to close.
Repeat to make another piece.
Sew the 2 pieces together to form a beak.
Sew the beak between the eyes between row 8 and 9.

Hat (optional, beige and light blue yarn )
Row 1 : using beige yarn, 6sc in a magic circle [6]
Row 2 : 2sc in each stitch [12]
Row 3: [1sc, 2sc]x6 [18]
Row 4: change to light blue yarn. 1sc in each stitch [18]
Row 5-6 : change back to beige yarn [1sc, 1sc, 2sc ] x6 [24] . Slip stitch and cut yarn leaving a tail for sewing to the head.


Tonkage - It is the last of the dinosaurs. It pretends to be a lizard to avoid being caught. 


Yarns used : hobbii 8/4 cotton light blue colour (body, hands, feet, tail), white colour (chest), darker blue colour (fins)
Hook : 2.5mm
Eyes : a pair of 5mm safety eyes with washer

Body 
Row 1: 8sc in magic circle [8]
Row 2: (1sc, 2sc in the next stitch)x4 [12]
Row 3: (1sc, 2sc in the next stitch)x6 [18]
Row 4: (2sc, 2sc in the next stitch)x6 [24]
Row 5: 1sc in each stitch [24]
Row 6: (3sc, 2sc in next stitch)x6 [30]
Row 7-11: 1sc in each stitch [30]
Row 12: 10sc . Change to white yarn and do 4sc. Change back to blue yarn and do 16sc [30]
Row 13-15: 9sc. Change to white yarn and do 6sc. Change back to blue yarn and do 15sc [30]
Row 16: 10sc . Change to white yarn and do 4sc. Change back to blue yarn and do 16sc [30]
Row 17:  (3sc, sc2tog in next stitch)x6 [24] 
Row 18:  (sc2tog)x12[12]
Add the safety eyes between row 7 and 8, with 5 stitches between the eyes. Fill up with polyester stuffing.
Row 19:  (sc2tog)x6 [6]
Slip stitch to close. Cut the yarn stitch up the hole and weave in the yarn.

Hands/legs (2 pieces for hands, 2 pieces for legs) 
Row 1: 6sc in magic circle
Slip stitch to close. Cut leaving some yarn for sewing to the body.
Sew the hands between row 11 and 12 somewhere below the eyes.
Sew the legs on the front part of the base such that only 1/4 of the feet can be seen from the front view.

Tail (in pale blue yarn)
Row 1: 4sc in a magic circle [4]
Row 2: (1sc, 2sc in next stitch)x2 [6]
Row 3: (2sc, 2sc in next stitch)x2 [8]
Row 4: 1sc in each stitch [8]
Slip stitch to close.
Cut a long tail for sewing. sew the tail between rows 13 to 17.

Fins (in dark blue yarn)
Row 1 : ch 12 [12]
Row 2 : (slip stitch in the 1st chain, 2sc in the next chain, slip stitch in the next chain)x4 [16]
Cut yarn and leave a long tail for sewing. Sew the fins from row 6 to the end of the tail.

Mouth
Sew the mouth between row 8 and 9 using black yarn.


Neko - Shy and timid. Neko worries about its body shape. 


Yarns used : hobbii 8/4 cotton light yellow colour (body, hands, feet, ear), brown (spots,ear), white (nose)
Hook : 2.5mm
Eyes : a pair of 5mm safety eyes with washer

Body 
Row 1: 8sc in magic circle [8]
Row 2: (1sc, 2sc in the next stitch)x4 [12]
Row 3: (1sc, 2sc in the next stitch)x6 [18]
Row 4: (2sc, 2sc in the next stitch)x6 [24]
Row 5: 1sc in each stitch [24]
Row 6: (3sc, 2sc in next stitch)x6 [30]
Row 7-11: 1sc in each stitch [30]
Row 12: 10sc . Change to brown yarn and do 2sc. Change back to yellow yarn and do 18sc [30]
Row 13: 9sc. Change to brown yarn and do 4sc. Change back to yellow yarn and do 17sc [30]
Row 14 : 6sc. Change to brown yarn and do 1sc. Change back to yellow yarn and do 1sc. Change to brown yarn and do 6sc. Change back to yellow yarn and do 16sc. [30]
Row 15: 5sc. Change to brown yarn and do 2sc. Change back to yellow yarn and do 2sc. Change to brown yarn and do 3sc. Change back to yellow yarn and do 18sc. [30]
Row 16: 6sc. Change to brown yarn and do 1sc. Change back to yellow yarn and do 3sc. Change to brown yarn and do 1sc. Change back to yellow yarn and do 19sc. [30]
Row 17: (3sc, sc2tog in next stitch)x6 [24]
Row 18: (sc2tog)x12[12]
Add the safety eyes between row 7 and 8, with 5 stitches between the eyes. Fill up with polyester stuffing.
Row 19: (sc2tog)x6 [6]
Slip stitch to close. Cut the yarn stitch up the hole and weave in the yarn.


Hands/legs (2 pieces for hands, 2 pieces for legs) 
Row 1: 6sc in magic circle
Slip stitch to close. Cut leaving some yarn for sewing to the body.
Sew the hands between row 11 and 12 somewhere below the eyes.
Sew the legs on the front part of the base such that only 1/4 of the feet can be seen from the front view.

Nose 
Row 1: 5sc in magic circle
Slip stitch to close. Sew a black dot on the upper half of the white circle. Sew nose between eyes.

Whiskers
Sew 2 short lines below each eyes using black yarn

Ears (1 piece in brown, 1 piece in yellow)
Row 1 : 4sc in a magic circle [4]
Row 2 : (1sc, 2sc in next stitch)x2 [6]
Slip stitch and cut a tail for sewing. Sew the ears between rows 3 and 6.

Tonkatsu - Fried chicken made of 1% meat and 99%fat. It is left behind for being too oily.

Yarns used : Brown fluffy yarn (body, hands and legs), pink yarn for the nose
Hook : 2.5mm
Eyes : a pair of 5mm safety eyes with washer

Fluffy yarn

Body 
Row 1: 8sc in magic circle [8]
Row 2: (1sc, 2sc in the next stitch)x4 [12]
Row 3: (1sc, 2sc in the next stitch)x6 [18]
Row 4: (2sc, 2sc in the next stitch)x6 [24]
Row 5: 1sc in each stitch [24]
Row 6: (3sc, 2sc in next stitch)x6 [30]
Row 7-16: 1sc in each stitch [30]
Row 17: (3sc, sc2tog in next stitch)x6 [24]
Row 18: (sc2tog)x12[12]
Add the safety eyes between row 7 and 8, with 5 stitches between the eyes. Fill up with polyester stuffing.
Row 19: (sc2tog)x6 [6]
Slip stitch to close. Cut the yarn stitch up the hole and weave in the yarn.

Hands/legs (2 pieces for hands, 2 pieces for legs) 
Row 1: 6sc in magic circle
Slip stitch to close. Cut leaving some yarn for sewing to the body. Make 4 pieces.
Sew the hands between row 11 and 12 somewhere below the eyes.
Sew the legs on the front part of the base such that only 1/4 of the feet can be seen from the front view.

Nose
Sew the nose between the eyes using pink yarn.

Sailor Hat (optional)
Row 1 : 4sc in a magic circle [4]
Row 2 : 2sc in each stitch [8]
Row 3: 1sc in each stitch [8]
Row 4: (1sc, 2sc in the next stitch)x4 [12]
Row 5-6 : Change to blue yarn. 1sc in each stitch [12]
Row 7 : Change back to white yarn. (2sc, 2sc in the next stitch)x4 [16]
Slip stitch and cut a long tail to sew to the top of Tonkatsu's head slightly to the left.

Monday, April 27, 2020

Crochet Turtle Keychain


This is a keychain size crochet turtle. 

Things you need
1. Milk cotton yarn for shell, base, flippers and head (hook size 4mm)
2. White yarn and black yarn for the eyes (hook size 3mm)
3. Stuffing
4. Key ring
5. Sewing needle
6. Glitter yarn for heart (optional) hook size 3mm 

Pattern
Base 
Row 1 - magic circle with 6sc (6)
Row 2 - 2 sc in each of the 6 stitches (12 )
Row 3 - 1sc, 2sc (Repeat 6 times) (18)
Row 4 - 1sc, 1sc, 2sc (Repeat 6 times)(24)
Row 5- 1sc, 1sc, 1sc, 2sc (Repeat 6 times)(30)
Slip and cut off yarn. 

Shell 
Row 1 - magic circle with 6sc (6)
Row 2 - 2 sc in each of the 6 stitches (12 )
Row 3 - 1sc, 2sc (Repeat 6 times) (18)
Row 4 - 1sc, 1sc, 2sc (Repeat 6 times)(24)
Row 5- 1sc, 1sc, 1sc , 2sc (Repeat 6 times)(30)
Row 6-8 - 1sc for each of the 30 stitches 
To attach the base to the shell, do 30single crochet together for the shell and base. Insert stuffing before sealing up. 
To create a tail for attaching the key ring , do 15 single crochet and leave a tail for sewing . 


Head 
Row 1 - magic circle with 6sc (6)
Row 2 - 2sc in each of the 6 stitches (12)
Row 3 - 1sc, 2sc (Repeat 6 times)(18)
Row 4-6 - 1sc for each of the 18 stitches
Row 7 -  1sc, sc2tog (Repeat 6 times)(12)
Row 8 - 1sc in each of the 12 stitches (12)
Slip stitch and leave a tail for sewing to the shell

Front flippers (2 pieces) 
Row 1 - magic circle with 6sc (6)
Row 2 - 2sc in each of the 6 stitches (12)
Row 3 - 1sc, 2sc (Repeat 6 times)(18)
Fold the circle into half and single crochet to seal up . Leave a tail for sewing to the base

Hind flippers (2 pieces) 
Row 1 - magic circle with 6sc (6)
Row 2 - 2sc in each of the 6 stitches (12)
Fold the circle into half and single crochet to seal up . Leave a tail for sewing to the base


Eyes (2 pieces)
Row 1 - magic circle with 6sc (6)
Row 2 - 2sc for the 1st two stitches only. 
Slip stitch and leave a tail for sewing . 
Using the black yarn and sewing needle, sew the eyes and lashes. 


Heart (optional) 
You can follow YouTube video https://youtu.be/NY11JkTbWbU


Assemble 
Sewing the head to the shell. Align the head opposite the tail end for key ring . 
Sewing the flippers to the base .


Attach the key ring and hide the remaining end of the yarn by sewing . 

If you are making the heart, sewing it to the side of the shell.


Thursday, April 16, 2020

Crochet Owl Keychain


This is a key chain size crochet owl.


Yarn used
Body + Ears + wings : Caron Cake (acrylic), Hook : 3.75mm
Eyes : White color red heart Soft Baby Steps, Hook : 3.25mm  Black Mercerized cotton yarn to sew the eye lids.  
Beak : Mustard color Marvel 8ply, Hook : 3.25mm

Other things you need :
1. Stuffing for the owl
2. A key ring
3. Sewing needle

Pattern

Body
Row 1 - 6 sc in magic circle (6)
Row 2 - 2sc in each stitch (12) 
Row 3 - 1sc, 2sc (repeat 6 times) (18) 
Row 4 - 1sc, 1sc, 2sc (repeat 6 times) (24) 
Row 5 to  Row 14 - 1sc for each of the 24 stitches
Row 15 - 2sc, sc2tog (repeat 6 times) (18)
Row 16 - 1sc, sc2tog (repeat 6 times) (12) 
Add stuffing 
Row 17  - sc2 tog (repeat 6 times) (6) 
Row 18 - Cut yarn leaving a long tail, use a sewing needle to close up the loop. Put the remaining yarn through the top of the body to attach the key ring.  


Eyes
Row 1 - 6 sc in magic circle (6)
Row 2 - 2sc in each stitch (12)
Slip stitch , cut and leave a tail for sewing
Use a sewing needle and black yarn to sew the eye lids.


Ears /beak
Row 1 - 4 sc  in magic circle (4)
Row 2 - 2sc , 1sc , 2sc, 1sc (6) 
Slip stitch , cut and leave a tail for sewing

Wings ( make 2 semicircles) 
Row 1 - 4sc in magic circle (4)
Row 2 - chain 1 and turn, 2sc in each of the next 4 stitch,(8). Dont pull into a circle. Rather , pull to form a semi circle as shown. 


To form the straight part of the semicircle, do 1sc across. You will need 3 stitches to get across as shown below. Lastly slip stitch , cut and leave a tail for sewing
 (Total stitch for the wing is 11) 


Assemble 
Using a sewing needle , attach the ears , eyes, beak and  wings. Using the yarn for the wings, sew some 'v' stitches below the beak. 


Monday, September 2, 2019

Crochet Unicorn Macaron Keychain


This is a keychain size Unicorn macaron
Diameter is 6cm and thickness is 4.5cm


Things you need :
1. White 5 ply milk cotton yarn or other unicorn colours . 
2. Pink 5 ply milk cotton yarn (you can use any other colour)
3. Yellow, pink, purple and blue 4 ply acrylic yarn for horn and flowers and cheeks
4. Hook 4mm and 2.5mm
5. Black 4 ply yarn for the eyes and mouth. 
6. 3 Pearl beads for the flowers
7. Filling for stuffing
8. A key ring

Macaron: (Make 2)
Using 5 ply white and pink milk cotton yarn. Hook 4mm
R1: 6 sc in magic ring (6)  
R2: 2sc in each st (12)
R3: *sc in next st, 2 sc in next st* rep **(18)
R4: *sc in next 2 st, 2sc in next st*, rep ** (24) 
R5: *sc in next 3 st, 2sc in next st*, rep ** (30)
R6: *sc in next 4 st, 2sc in next st* rep ** (36)
R7: sc in each st (36)
R8: Switch to pink yarn and do sc back loop only for each of the 36 stitches. Slip stitch and cut and leave a tail for sewing. This is the filling part of the macaron. You can use any colour you like. 

Repeat R1 to R7 only for the bottom piece . 

Ears: (make 2 )
Using 5ply white milk cotton yarn. Hook 4.0mm
R1: 4 sc in magic ring (4)
R2: *sc in first st, 2sc in next st* rep ** 1x (6)
R3: *sc in first st, 2 sc in next st* rep ** 2x (9)
Slip stitch, cut and leave a tail for sewing

Horn (make 1)
Using 4 ply yellow yarn. Hook 2.5mm
R1: 4 sc in magic ring (4)
R2: sc in first 3 st, 2 sc in next st (5) 
R3: sc in first 4 st, 2 sc in next st (6) 
R4: sc in first 5 st, 2 sc in next st (7)
R5: sc in first 6 st, 2 sc in next st (8)
R6: sc in first 7 st, 2 sc in next st (9)
Slip stitch, cut and leave a tail for sewing


Flower: (make 3)
Using 4ply pink, purple and blue yarn. Hook 2.5mm
R1: 5 sc in magic ring and sl st to the first stitch
R2: *ch 1, dc, ch 1 and sl st in the same stitch, and sl st to the next st*, rep ** to form 5 petals. Slip stitch , cut and leave a short tail for sewing.


Assemble :
Step 1 : Using the tail pink yarn, sew the 2 pieces of macaron together. Pass the needle though the inner "V" of each macaron only. Just before sealing up the opening, add stuffing to fill up the macaron.

Step 2: Attached the 2 ears as shown below. Sew on the eyes and mouth (optional)

Step 3: Sew on the horn. Add a little stuffing to firm up the horn.

Step 4: Sew on the flowers

Step 5: Sew on the pearl beads (optional)

Step 6: Lastly, attached a key ring.


Thessalonians 5:16-18: “Rejoice always, pray continually, give thanks in all circumstances; for this is God’s will for you in Christ Jesus." 


Monday, August 19, 2019

Crochet Milk Carton Keychain


This is a key chain size Milk Carton

Things you need 
1. A pair of 5mm or 6mm safety eyes
2. Cardboard for base and sides
3. 5ply white and coloured milk cotton yarn of your choice 
4. 4ply black yarn for mouth
5. 4ply pink yarn for cheek
6. Key ring
7. crochet hook  3.5mm
8. stuffing (available at Diaso)
9. sewing craft needle.

Steps 
1. Start with the base (coloured yarn)
Row 1: Chain 8. 
Row 2-6: single crochet (7)


2. Building the body (coloured yarn) (3 rows)
Row 1: single crochet in each stitch with 3 single crochet for each of the corner stitch. This helps to build up the squarish corners. 
Row 2-3: single crochet 

3. Changing colour to white yarn (4 rows)
Row 4-7 : single crochet 

4. Changing colour back to coloured yarn (6 rows)
Row 8-13: single crochet . Slip stitch and leave a Long tail for sewing.


5. Cut a squarish cardboard for the base. Cut a rectangular stripe for the sides of the square body. These cardboard helps to give a boxy look.


6. Fit in the cardboard . The height of the cardboard for the sides of the body should be about the height of row 8. To attach the eyes, pierce the cardboard with a sharp object and make sure the eyes pass thru the cardboard. Lock the eyes with the washer. Sew the mouth and cheeks. Stuff with fillings.


7. Using the tail of the coloured yarn, sew and seal the TOP . You need to fold the 2 sides in just like those real milk cartons.


top view

side view 


8. Using white yarn, do 2 rows of single crochet on the TOP. Cut and leave a long tail of white yarn to sew the words MILK on the front side.


9. Lastly , sew the key ring to the left side of the TOP.